

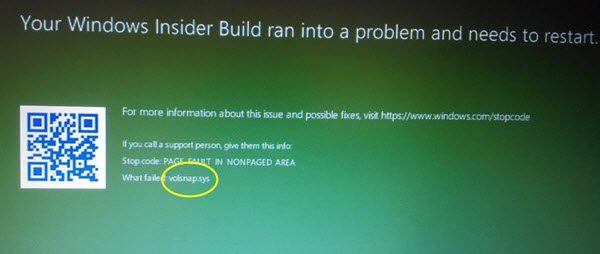
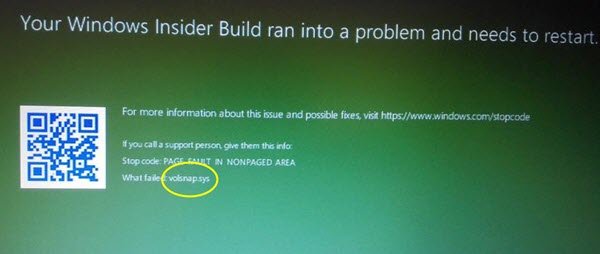
Fix volsnap.sys failed BSOD error on Windows 11/10
Volsnap.sys is a Windows operating system file that is associated with the Volume Shadow Copy Service (VSS). This file is known to cause a Blue Screen mistake. Just the main reasons include conflicts like RAM or Difficult Deejay Issues, incompatible firmware, corrupt drivers or malware infection, etc. Fixing this issue is straightforward. However, there are various potential workarounds for the same.
In that location can be the following BSOD Errors that are related to this file:
- KMODE EXCEPTION NOT HANDLED.
- Page Mistake IN A NONPAGED Expanse.
- System THREAD EXCEPTION Not HANDLED.
- IRQL Not LESS OR EQUAL.
Fix volsnap.sys Blue Screen error
The following potential fixes volition be carried out to fix BSOD errors related to volsnap.sys (Book Shadow Copy Driver) on Windows eleven/x:
- Update or Rollback Drivers.
- Restart or Terminate Volume Shadow Re-create Service
- Run System File Checker
- Run ChkDsk Utility
- Check the Memory for the errors.
If you create a System Restore point usually, you tin try to undo whatsoever modifications on your computer, past performing System Restore. It is also recommended that you carry out these tasks mentioned below in Safe Mode with Networking simply.
1] Rollback or Update Drivers
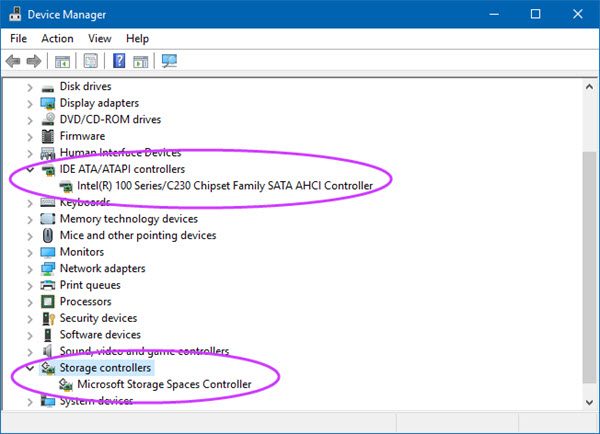
The main drivers that might be a crusade for this particular file will be listed under the department of IDE ATA/ATAPI controllers likewise equally Storage Controllers inside of the Device Manager. And so if you recently updated these drivers, roll back and see. If you did not, then we suggest you Update these drivers.
2] Restart or Terminate Volume Shadow Copy Service
Type, services.msc in the Start search box and hit Enter to open the Windows Services Managing director. Locate Volume Shadow Copy Service, and then double-click on it to open its Backdrop box. Stop the Service and then Get-go it once again. Or else right-click on it and select Restart.
3] Run System File Checker
Right-click on the Start button and click on Command Prompt (Admin), blazon in the post-obit command to run Organisation File Checker and so hit Enter.
sfc /scannow
Restart your system after the scan is completed.
You tin can as well utilise our freeware FixWin to run the Arrangement File Checker utility with a click.
four] Run ChkDsk Utility
To run ChkDsk, openThis PC.Right click on your Operating Organisation Partition for Windows.
Click on Properties. Now, navigate to the tab labeled asTools.
Nether the section forError Checking,click onCheck.
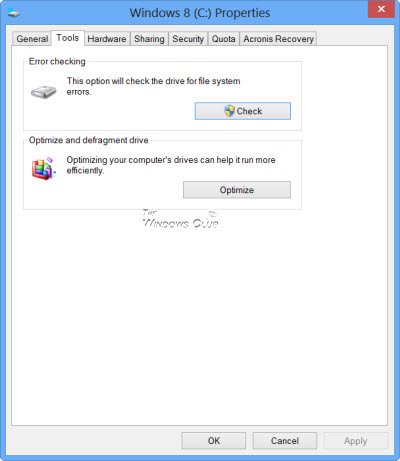
A new mini window will now pop up. Click onScan drive.
Let it scan your disk drive partitioning and after that reboot your computer for the changes to take effect.
five] Check the Memory for the Errors
To fix any issues with your RAM, follow the following steps.
Run the Retention Check on your estimator. Outset by hitting theWINKEY + R push combination to launch theRunutility. Then type in,mdsched.exeand then hitting Enter. It will launch the Windows Memory Diagnostic Tool and will give out two options-
- Restart now and check for issues (Recommended)
- Check for problems the next time I start my computer
According to the option selected by you, the estimator will restart and check for memory based problems. If y'all get any issues there, information technology will fix it automatically else if no bug are detected, this is probably not the cause of the upshot.
All the best!

Source: https://www.thewindowsclub.com/fix-volsnap-sys-failed-bsod-error-on-windows-10
Posted by: clevengertinur1961.blogspot.com
0 Response to "Fix volsnap.sys failed BSOD error on Windows 11/10"
Post a Comment